Outlook の自動補完リストに連絡先を追加するにはどうすればよいですか?
Outlook の自動補完機能は、メール作成時にこれまでに入力した内容をもとに受信者を素早く見つけるのに役立ちます。既定では、メール送信後にその連絡先のメールアドレスが自動補完リストに追加されますが、今後の作業効率をさらに高めるために、複数の連絡先アドレスを一度に手動で自動補完リストに追加することも可能です。本記事では、Outlook で複数のメールアドレスを同時に自動補完リストに追加する方法をご紹介します。
Outlook の自動補完リストに連絡先を追加
Outlook の自動補完リストに複数の連絡先を追加するには、以下の手順に従ってください。
1.メールメッセージを作成しましょう。
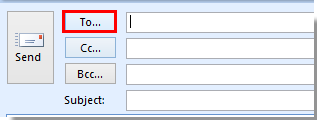
2.「メッセージ」ウィンドウで、メッセージヘッダーにある「To」ボタンをクリックしてください。
3.「名前の選択」ダイアログボックスで:

4.これにより、選択したすべての連絡先が「メッセージ」ウィンドウの「To」フィールドと自動補完リストの両方に追加されます。その後、「メッセージ」ウィンドウを保存せずに閉じてください。
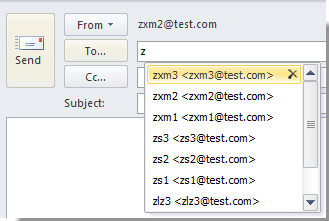
5.これ以降、「To」または「Cc」フィールドに受信者のメールアドレスの最初の文字を入力すると、上記で選択した関連するすべての連絡先が自動補完リストに即座に表示されます。下図をご参照ください:
最高の Office 生産性ツール
まったく新しいKutools for Outlook を、100 以上の驚きの機能とともに体験しましょう!今すぐダウンロード!
🤖KUTOOLS AI:高度な AI 技術を活用して、メールの返信、要約、最適化、拡張、翻訳、作成など、あらゆる操作をラクラクこなします。
📧メール自動化:自動返信(POP および IMAP 対応)/メールのスケジュール送信/メール送信時にルールに基づいて自動 CC/BCC/自動転送(高度なルール)/自動で挨拶文を追加/複数の宛先を持つメールを個別のメッセージに自動分割...
📨メール管理:メールの取り消し/件名などを基準に詐欺メールをブロック/重複したメールを削除/高度な検索/フォルダーを整理...
📁添付ファイルプロ:一括保存/一括分離/一括圧縮/自動保存/自動的に切り離す/自動圧縮...
🌟インターフェースの魅力:😊さらに美しくクールな絵文字を多数収録/重要なメールが届いた際に通知/Outlook を閉じる代わりに最小化...
👍ワンクリックの驚き:全員に【Attachment】付きで返信/フィッシングメール対策/🕘送信者の現在時刻ゾーンを表示...
👩🏼🤝👩🏻連絡先とカレンダー:選択したメールから連絡先を追加を一括登録/連絡先グループを個別のグループに分割/誕生日のリマインダーを削除...
Kutools はお好みの言語でお使いいただけます!英語、スペイン語、ドイツ語、フランス語、中国語をはじめ、40 以上の言語をサポートしています!
ワンクリックでKutools for Outlook の機能を即解放!今すぐダウンロードして、効率を飛躍的にアップさせましょう!


🚀 ワンクリックダウンロード — Office アドインをすべて入手
強く推奨:Kutools for Office(5-in-1)
ワンクリックで5 つのインストーラーを 一括ダウンロード! ―Kutools for Excel、Outlook、Word、PowerPointおよびOffice Tab Pro。今すぐダウンロード!
- ✅ワンクリックで簡単操作:5 つのセットアップパッケージをたった1 回のクリックで一括ダウンロードできます。
- 🚀どんな Office 作業にも対応可能:必要なときに、必要なアドインをすぐインストールできます。
- 🧰含まれるもの:Kutools for Excel / Kutools for Outlook / Kutools for Word / Office Tab Pro / Kutools for PowerPoint